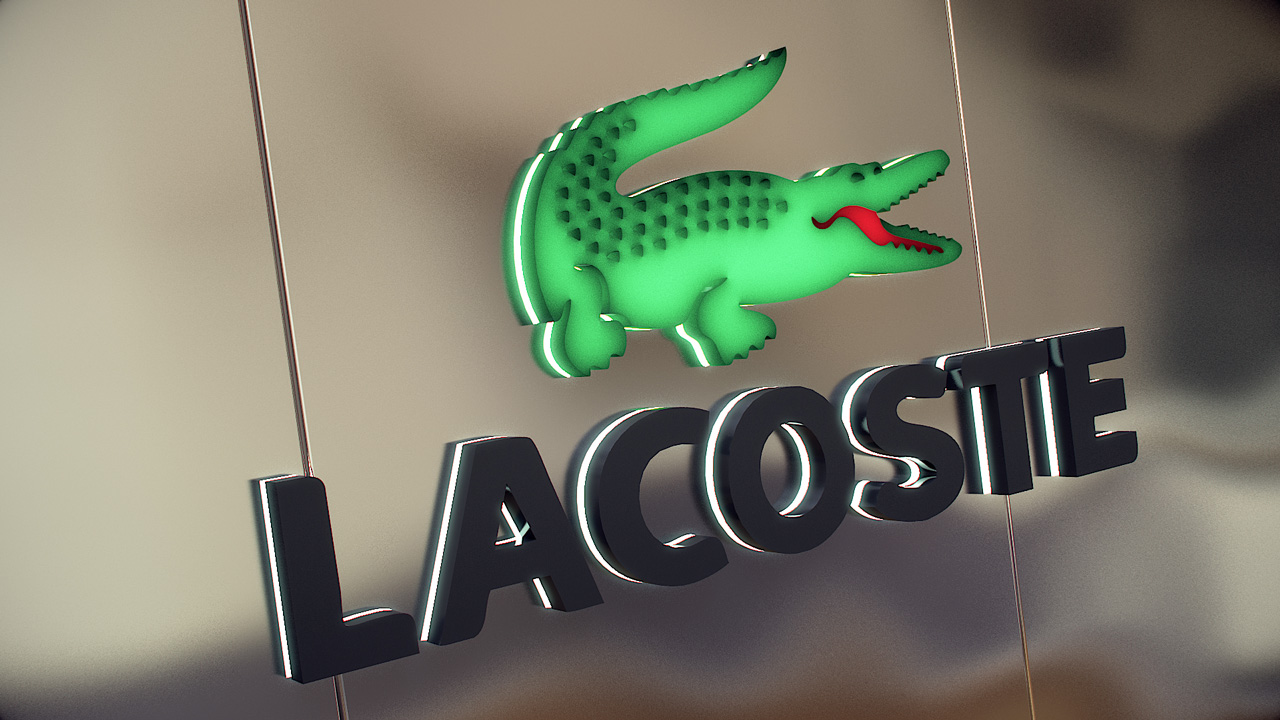
In this quick tutorial, I’ll show you an easy way to convert a 2D Logo image into a 3d model for use in any commercial project, with the help of Adobe Illustrator and 3ds Max.
Find a good logo image
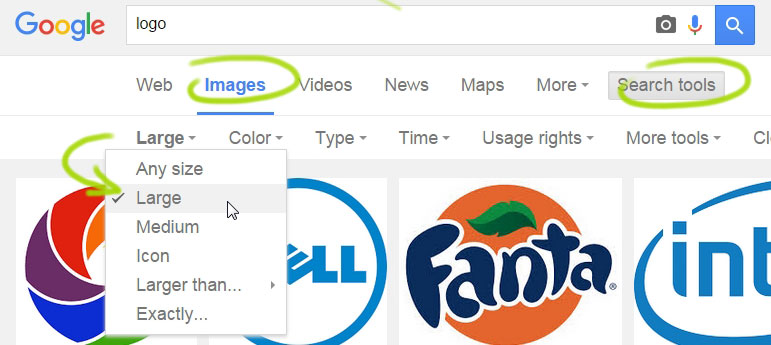
Make your life easier by finding a logo image with high resolution, 1200px, and up should do the job. You can use the google chrome image tools and select to show only large size images.
Convert image into vectors
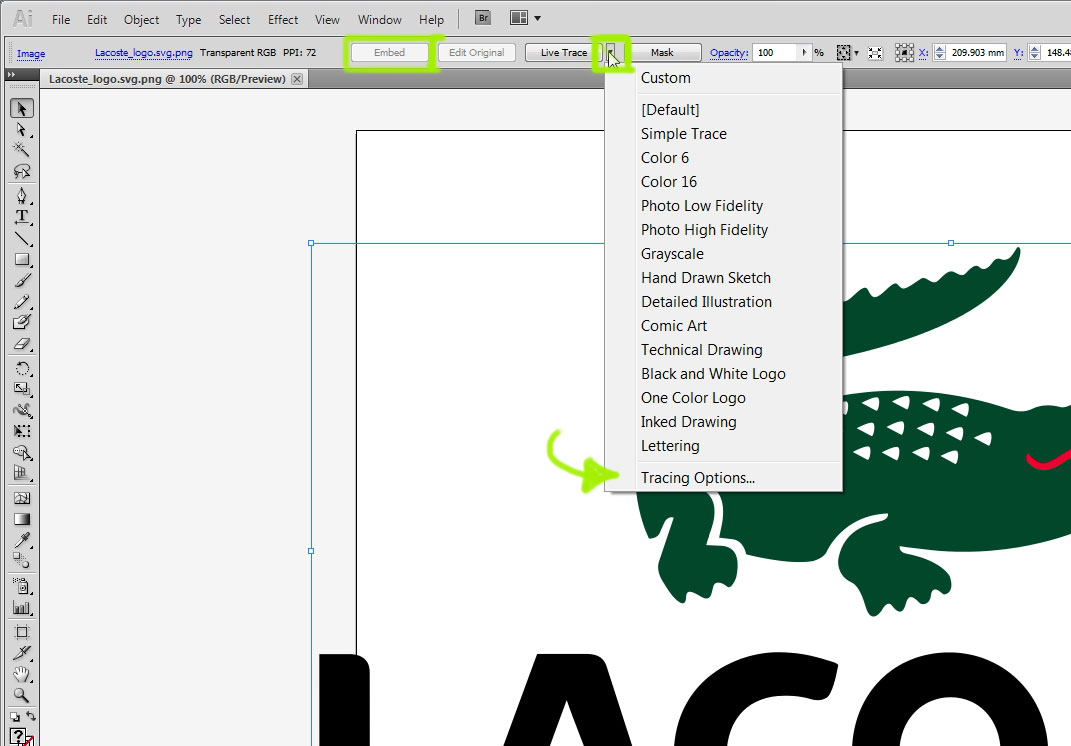
Once you’ve found a decent image it’s time to open it in a vector tracing program such as Adobe Illustrator.
Our goal here is to convert the artwork into splines that can later be used as a shape inside 3ds max. Luckily Illustrator doses it almost automatically for us.
With the artwork selected first, click on embed, then on the little arrow right next to the live trace button, click on tracing options.
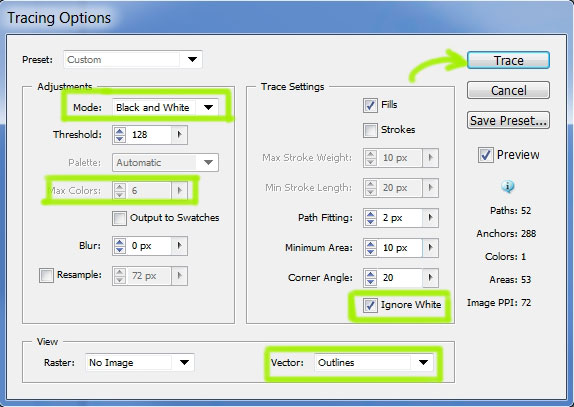
In the options window, we need to tell the program what to consider in the tracing process. If your logo contains colors, you should switch the mode from black & white to color. Specify how many colors are there, in the “max color” setting.
Next, check the “Ignore White” checkbox so the tracing process will ignore the background area (or any other white color in the image).
Lastly, select the Outline option in the “vector” setting. Click on the TRACE button.
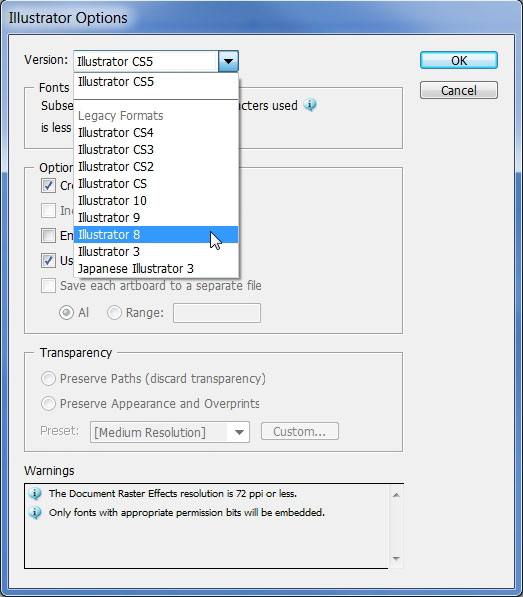
Now save the AI document as Illustrator8 version as shown below (that seems to work well in 3ds MAX).
Import & clean
Open 3ds Max and import the Illustrator file you’ve just created. Before we can convert the spline object into 3d mesh we need to do a little cleaning and scaling.
While the trace process was quite accurate, there might be some overlapping or unwanted segments inside the shape.
Take a close look at your spline object and delete any excess segments inside it: select the object->go to modify panel->click “segment” under the selection tab and start deleting.
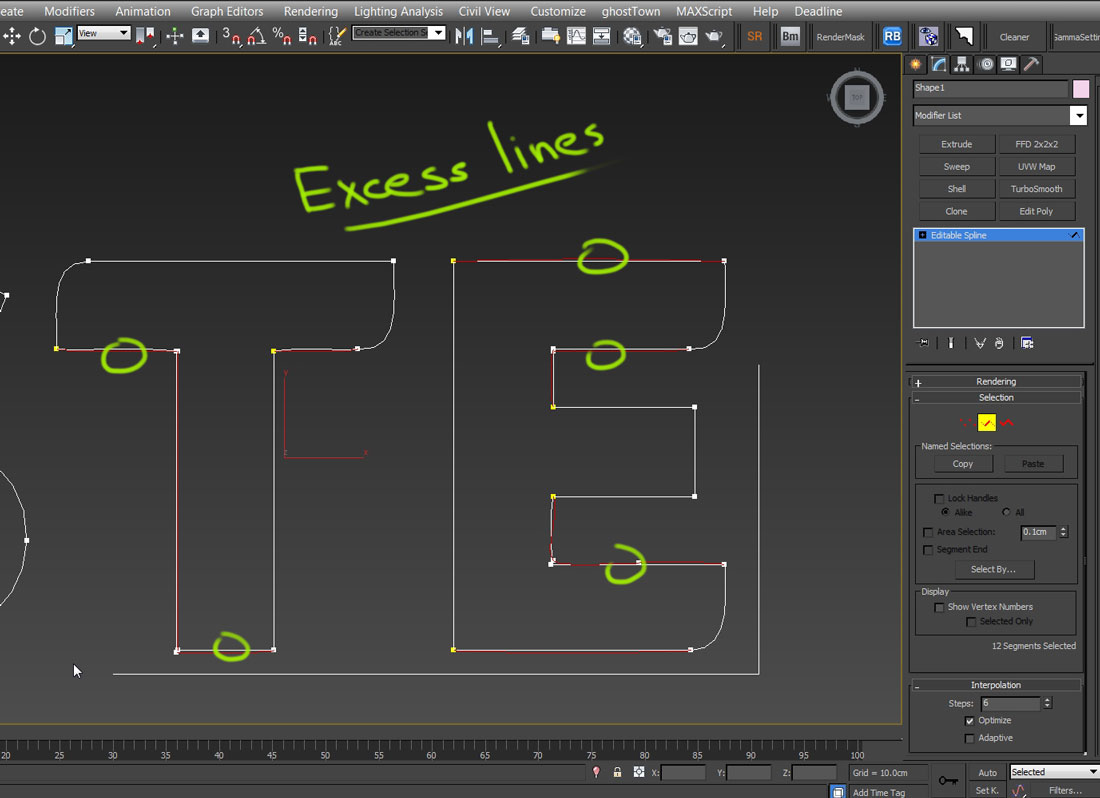
In order to convert the spline into a surface, we have to make sure that it’s a closed shape with no open ends at all, to do so select all vertices and click on “weld”.
If not all are welded then perhaps some are too far away from each other. You can increase the weld threshold (next to the weld button) or do that manually by moving them closer and welding.
Scale & Extrude
It’s time to correct the size of our object. An easy way to see the overall dimensions of the object is by selecting it, going to the “Utilities” panel, and selecting “Measure”.
Right at the bottom, there is an X-Y-Z dimension. Scale the spline up or down to your desired size.
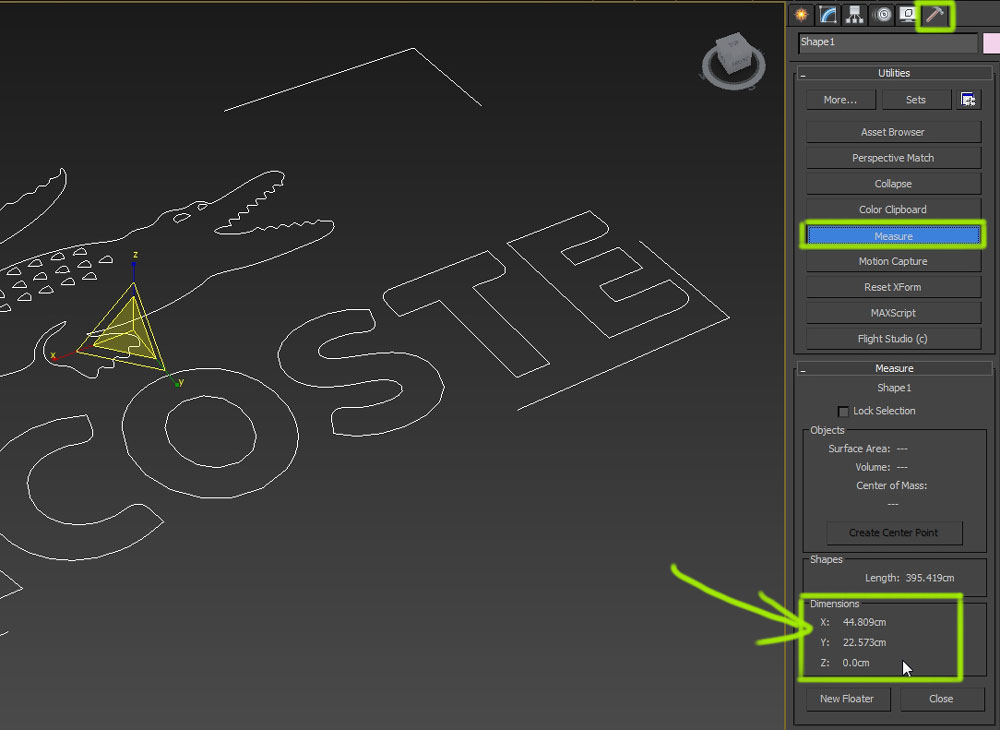
Still under the “Utilities” panel select “Reset Xform”->” Reset selected” to reset the scale operation (otherwise all modifiers will be scaled too when applying them on top).
Back to the modify panel, right-click the Xform modifier and select collapse all.
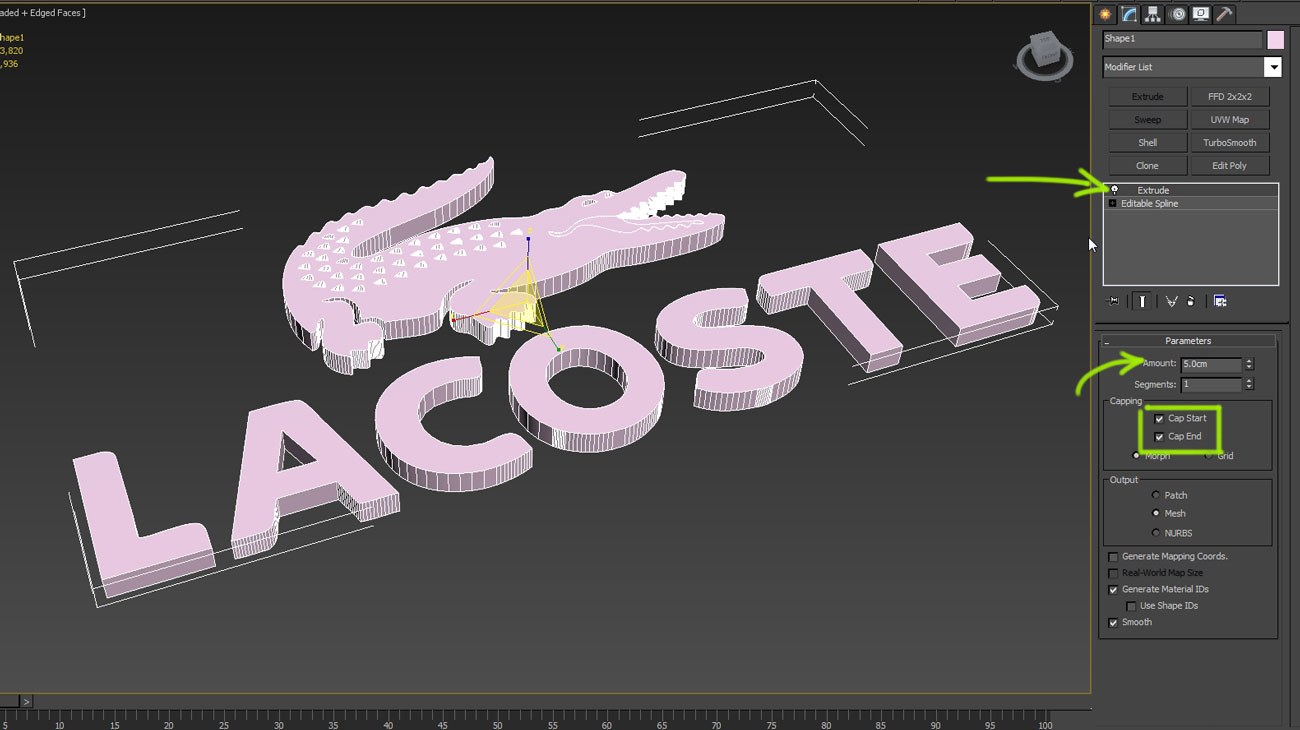
We are now ready to extrude the shape. Add an extrude modifier and set the height, make sure that “cap start” and “cap end” are selected.
Applying materials
This section is more of a suggestion on how to give our logo a glowing look, like most signs that you see in commercial areas. But you can make any material that suits your needs.
I’ll start by opening the material editor and creating a new multi/sub-object material.
Next, set the number of materials according to the number of different colors that in your logo, plus one more for VrayLight material that will light the backside and inside of the object.
For each slot, add a VrayMtl and set the diffuse color, and reflection amount. Next, add each one of them into Vray2sideMtl so light could show through from the inside.
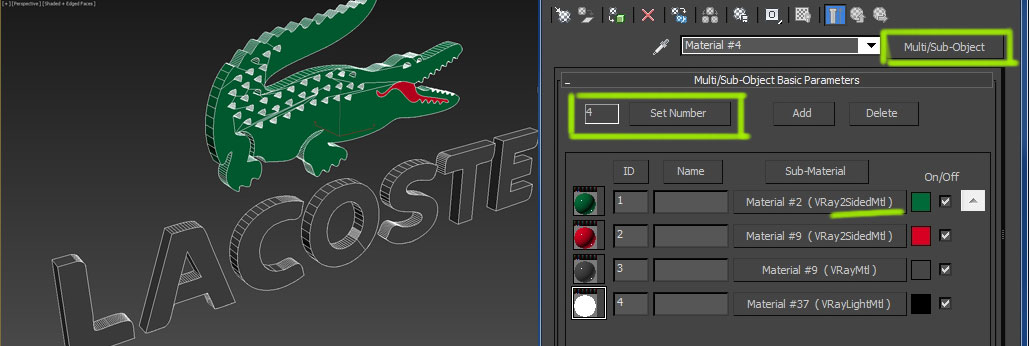
In the last slot add VrayLightMtl, set the intensity and color of the light. Check “Compensate camera exposure” and “Emit light on the backside”.
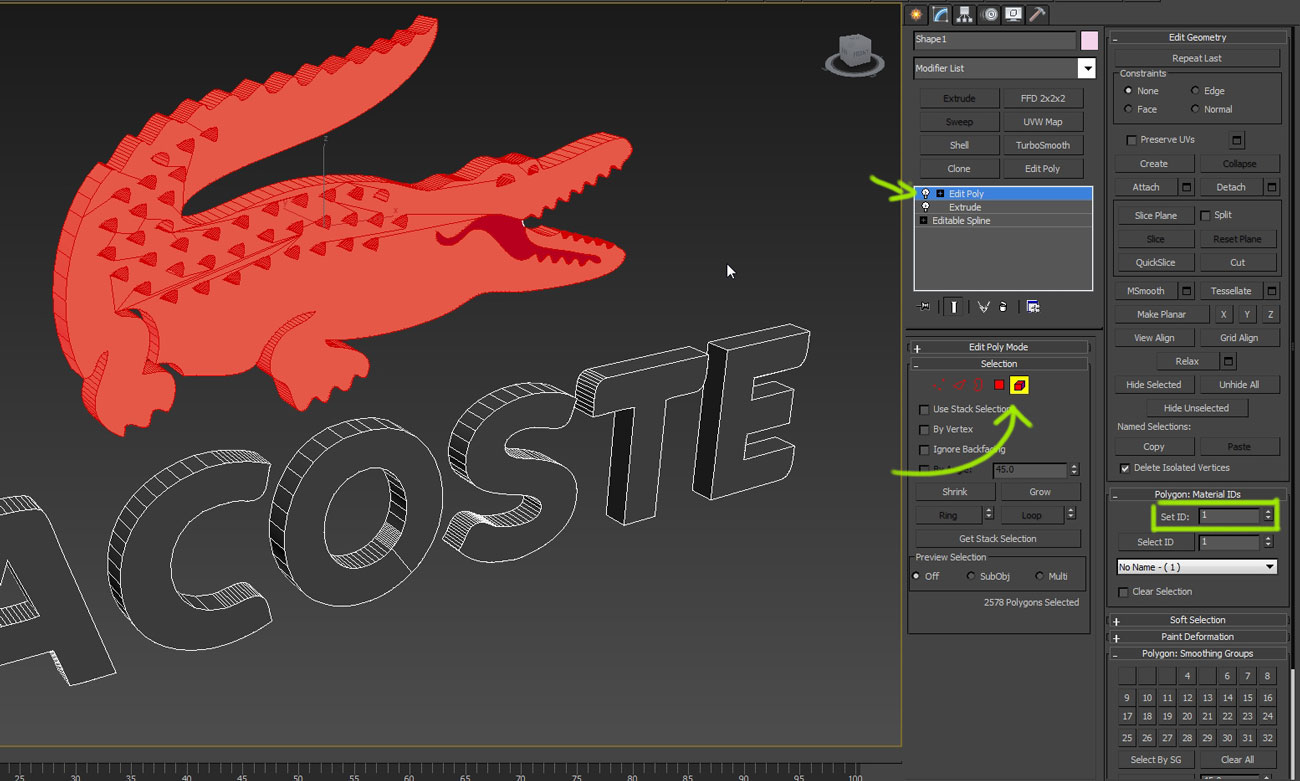
Convert the object into Editable poly and under each element set the correct material ID according to the multi/sub-object IDs. For the backside of the logo set the last id.






plz i want this setup ?