
Pool Model & Materials
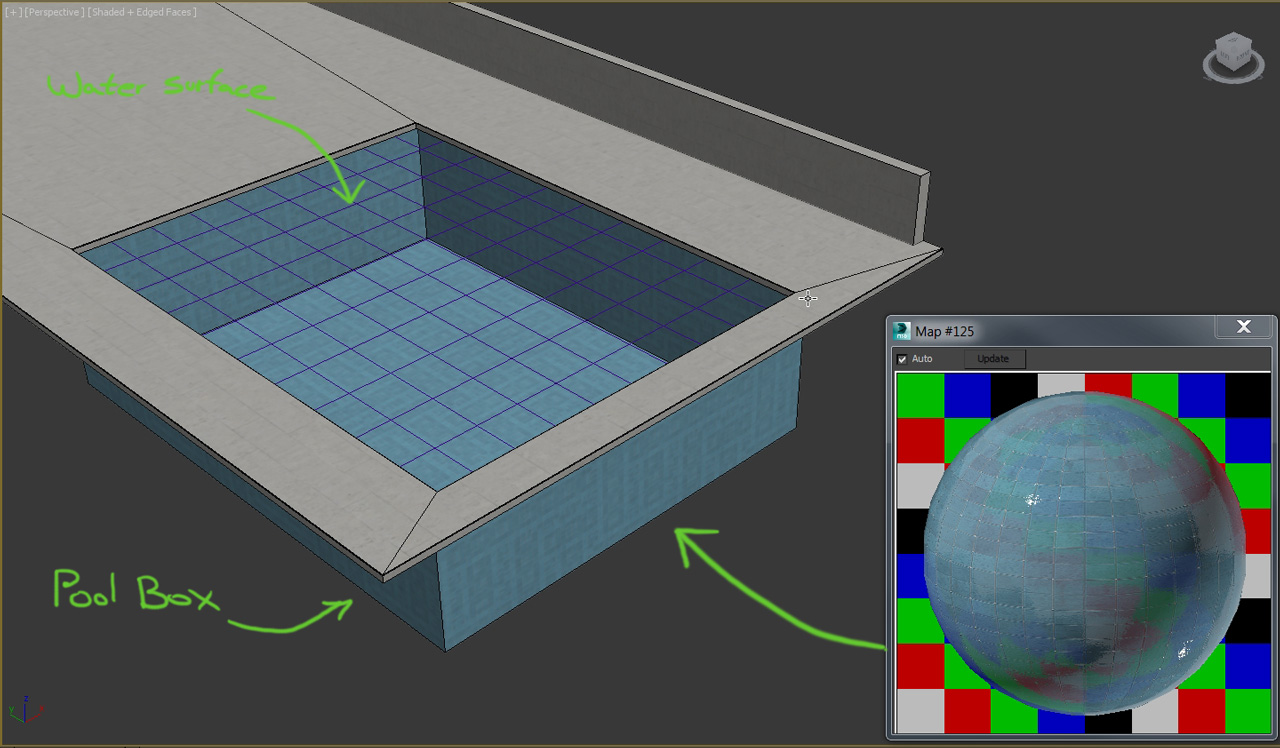
Before adding the pool water caustics effect I’ll start by creating the pool model itself which is very straightforward, a simple box converted to editable poly with the top polygon removed and shell modifier to give it some thickness. For the material, I use a mosaic texture with light blue color which will give nice details and color to the water later on. The surface of the water is just a flat plane covering the entire pool area.
Water Material
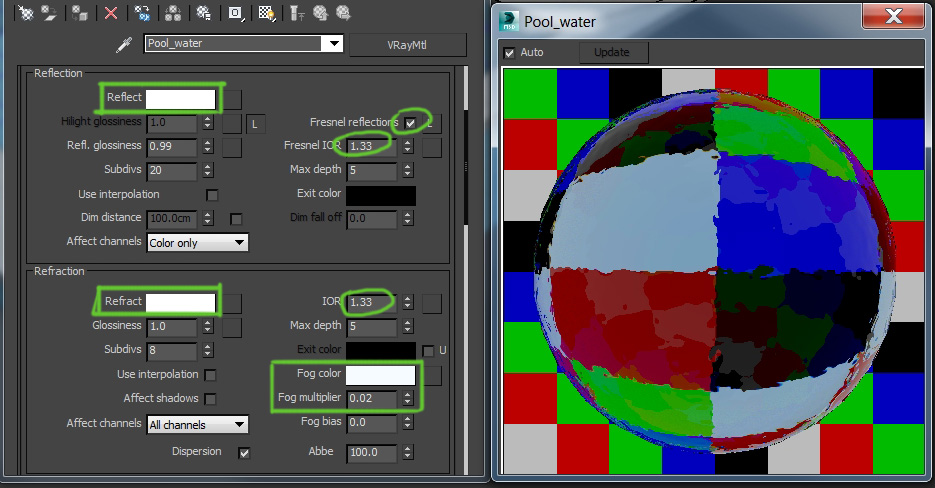
Clear pool water is very easy to create. Set reflection and refraction color to pure white, enable Fresnel reflections and set an IOR of 1.33 (IOR value of water) for both the reflection and refraction.
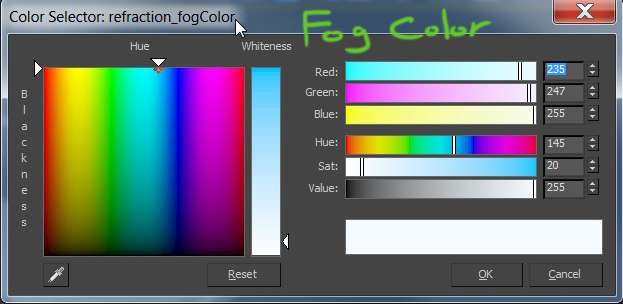
Set a very light bluish color in the fog color slot and decrease its multiplier to about 0.02, This will boost the watercolor a bit more. If the water gets too dark, just set a lighter color or decrease the multiplier even more.
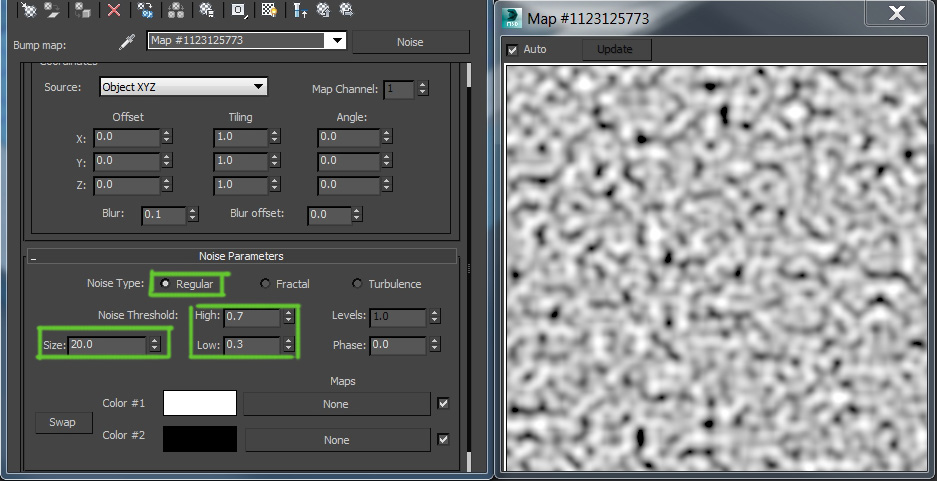
The water waves can be created in various methods, you can deform the surface itself with displace modifier or V-ray displacement mod, or you can go with a simpler way by using a map in the bump slot which I’ll show you in this tutorial.
Click on the bump slot and add a “Noise” map, this map is very useful in creating uneven surfaces with bumps and deforms like most materials in the real world.
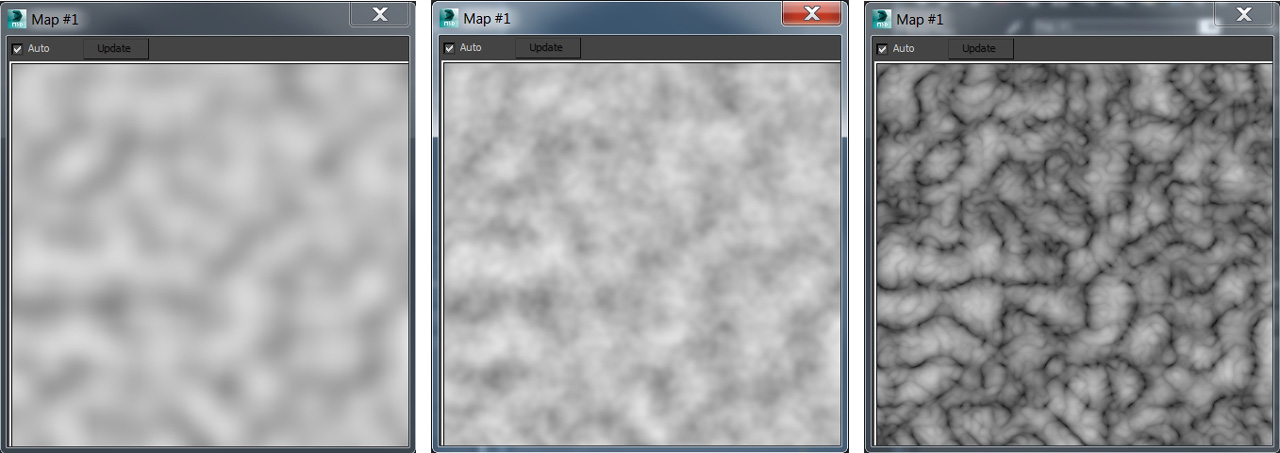
There are 3 types of noise on this map: Regular, Fractal, and Turbulence. It’s always a good idea to experiment with these types when creating a new material until you’ll find the right look for you. I made about 10-15 test renders to get the right kind of waves for the pool water and the right caustics look which I’ll explain later on.
I decided to go with a “regular” pattern with a size of 20. I also increased the map contrast by changing the Noise threshold as shown in the image below. Finally, the bump amount was set to 4.0 to get nice calm waves.
Caustics
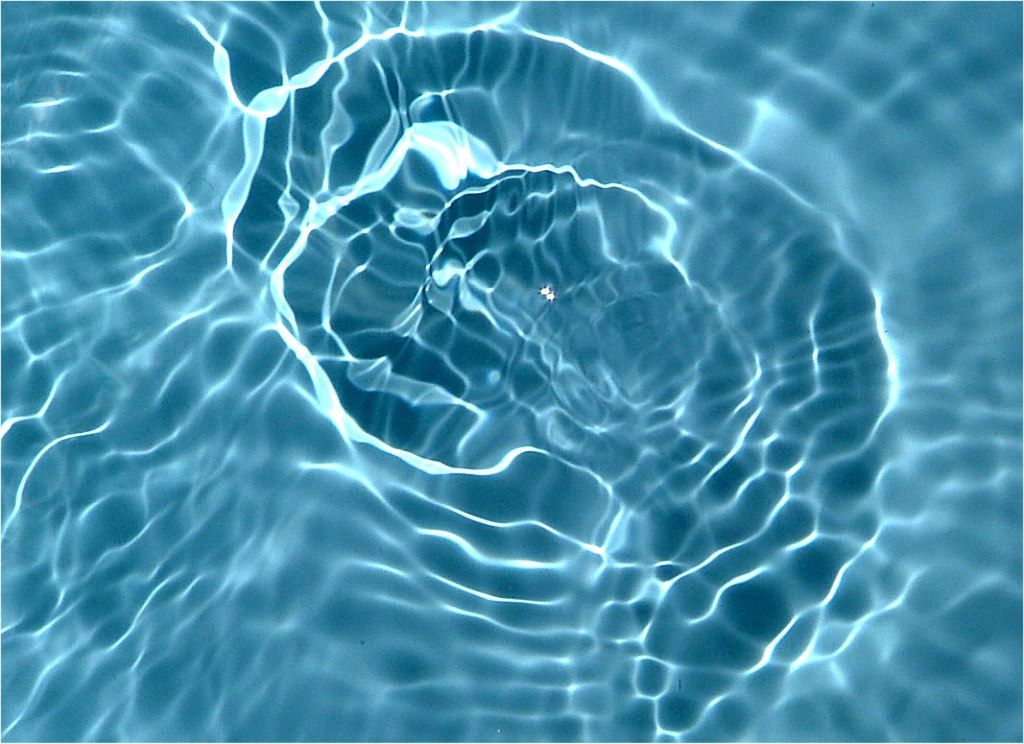
Caustic is an optical phenomenon that occurs when light is refracted or reflected by a curved surface. The rays of light get concentrated by the uneven surface and therefore, produce various patterns of bright light.
To create caustics for our pool, simply go to render settings and turn on “caustics” under the “Indirect illumination” tab.
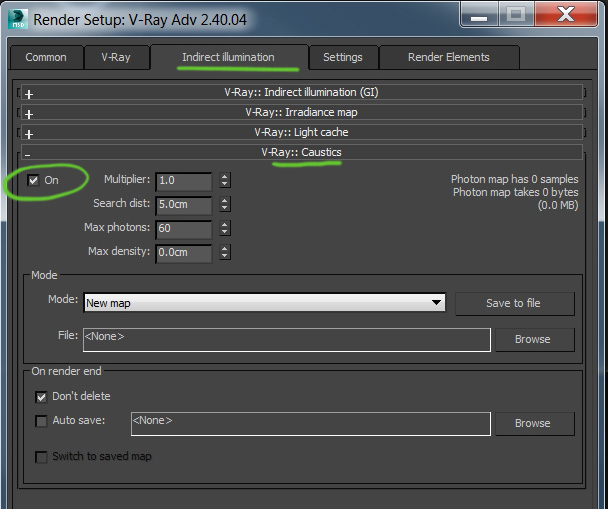
This effect can take a long time to calculate when set to high quality, In order to minimize computing time I like to use a little “trick”.
since caustics needs a direct light to create a good photon map, instead of using all the lights in the scene, I’ll create a separate direct light (Vray sun in this case) and exclude all objects from it. This way it will only calculate the caustics with no extra illumination added to the scene.
Select the Vray sun and click on exclude under the modify panel. In the pop-up window switch from exclude to include and leave the list empty.

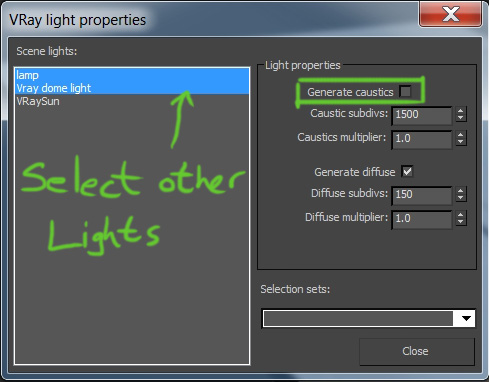
I also need to select all my other lights and disable the “Generate caustics” option (select the lights ->right click->Vray properties->disable caustics).
Note: I’m using HDRI map to illuminate the scene so I’ll set the Vray sun to match the direction of the sun in the HDR image.
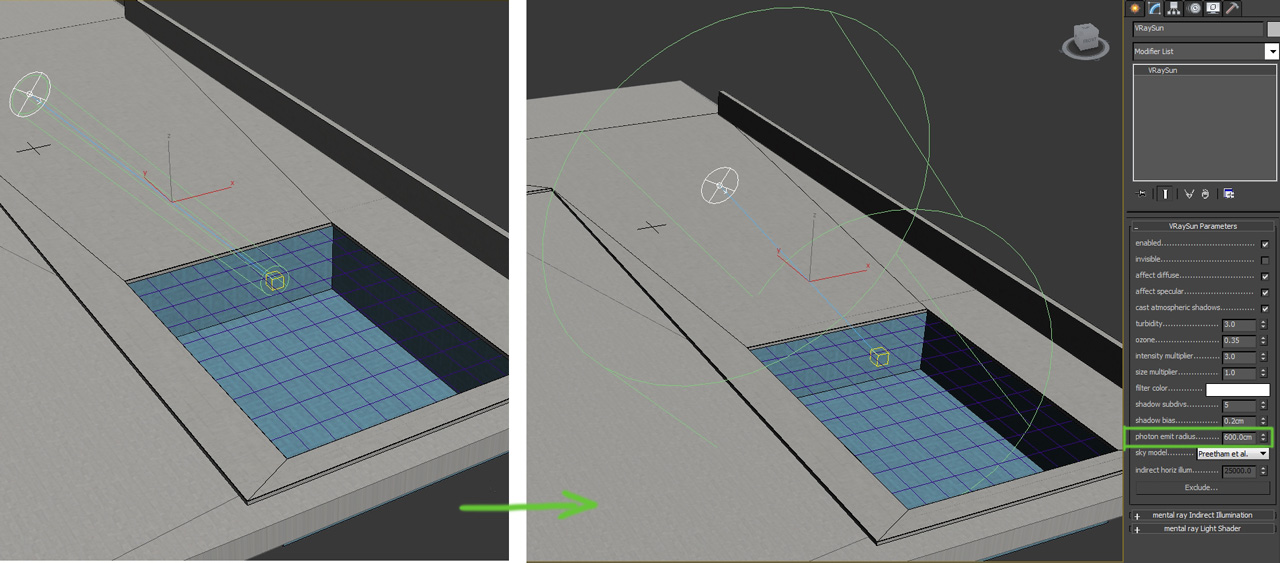
If you make a test render now, you most likely noticed that there are no caustics visible in the water, or they are only limited to a small circle, that’s because the caustics area is controlled by the sun’s photon radius.
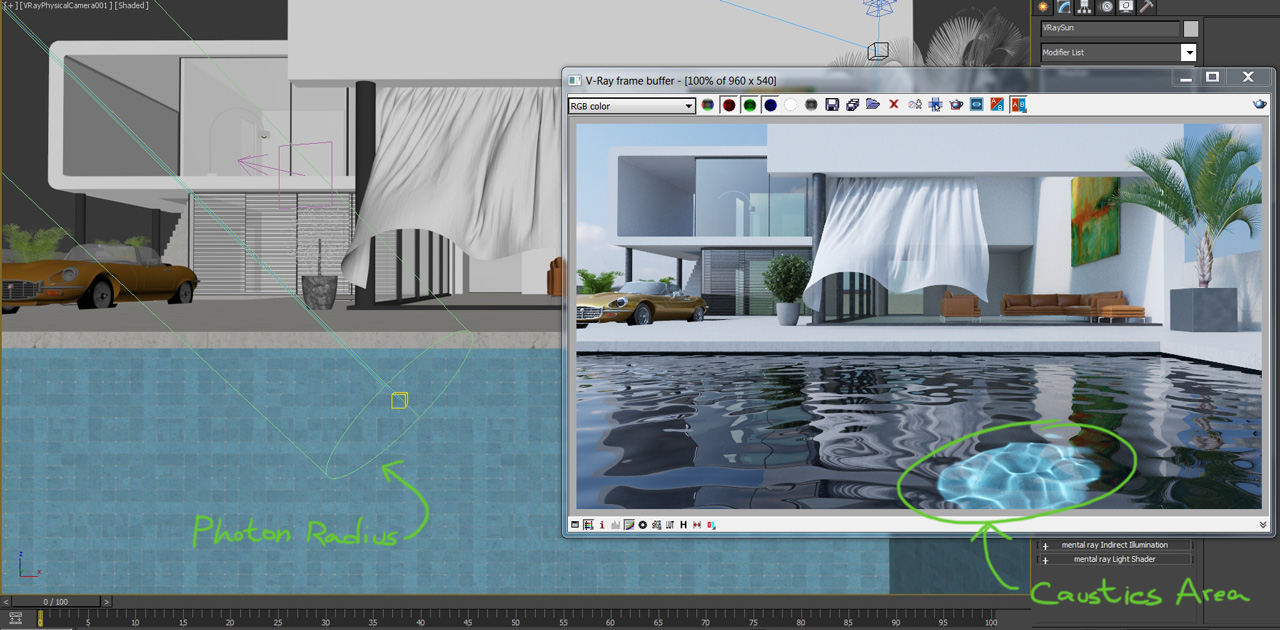
To fix this just move the sun to the center of the pool and in the modify panel increase the “photon emit radius” until it covers the pool.
At this point our caustics are visible but they are a bit blurry and not as bright. We can change this in the caustics options:
Multiplier– controls the caustics intensity.
Search distance-lower value will get sharper caustics but with some noise, a higher value will get clean but blurred caustics
Max photon – same as search distance
After several tests I’ve decided to set the values as following: Multiplier = 3, search distance= 3, max photon= 100. Keep in mind that the noise map and bump amount have a great impact on the caustics look as well. Finally, I’ve increased the caustics subdivs under the sun’s parameters from 1500 to 8000 for better quality.
Note: DO NOT enable “effect shadows” under refraction in the water material, otherwise the caustics will not work correctly.
Light Dispersion Effect
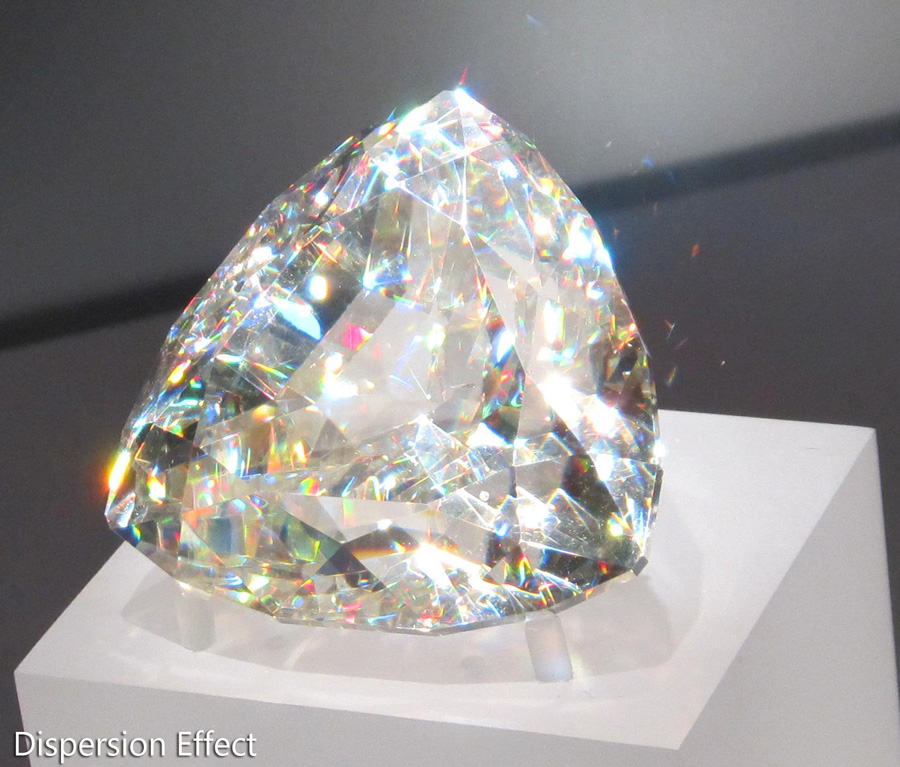
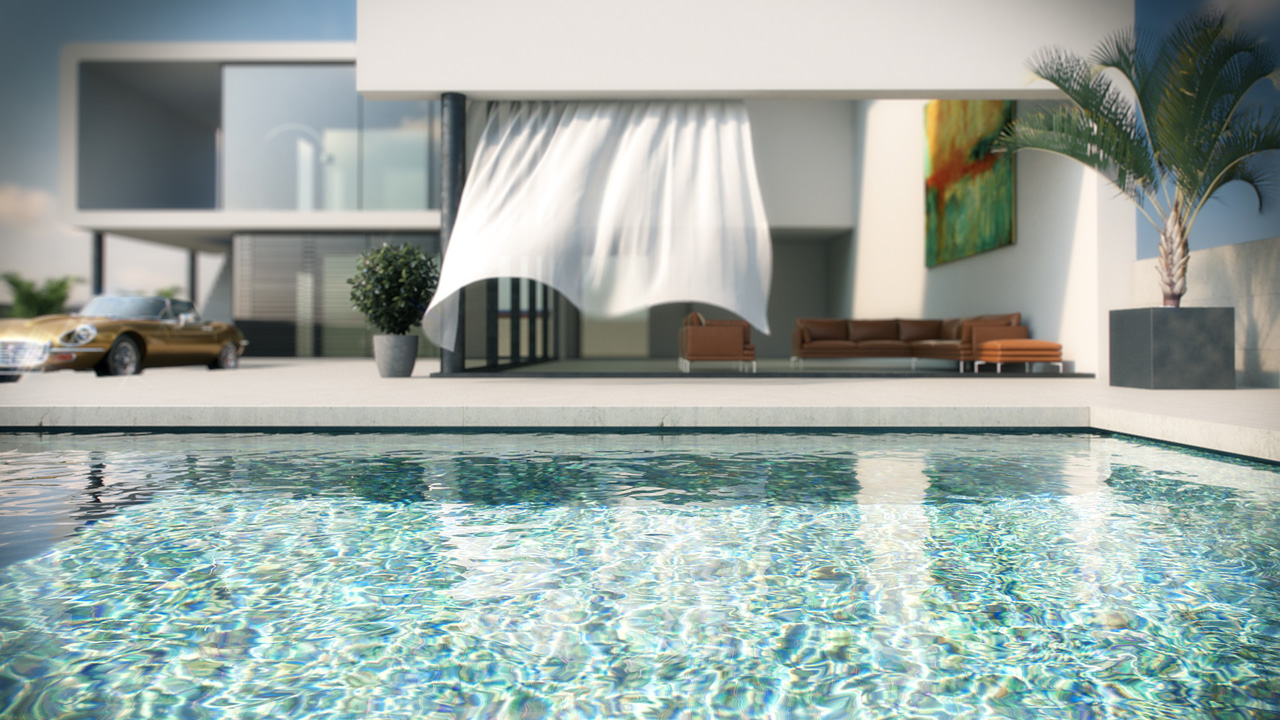
This is also an optic phenomenon in which a white light gets dispersed into different colors of light much like rainbows or light through a prism. To enable this effect, go to the water material and enable “Dispersion” under Refraction.
The “Abbe” controls the spread of the effect, a lower value makes it blurry and a higher makes it sharp, I’ll set it to about 100 for a sharp look.
Well…that’s it! Let me know if you like this tutorial in the comments below.
Cheers.
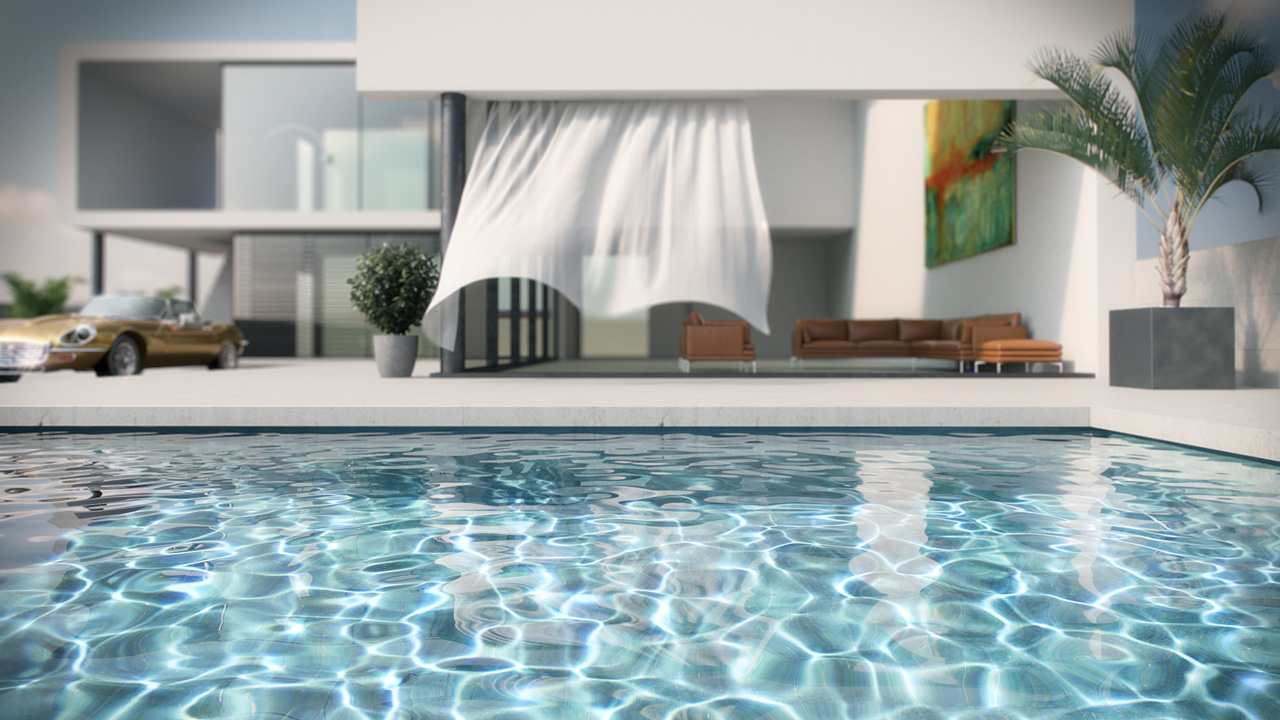
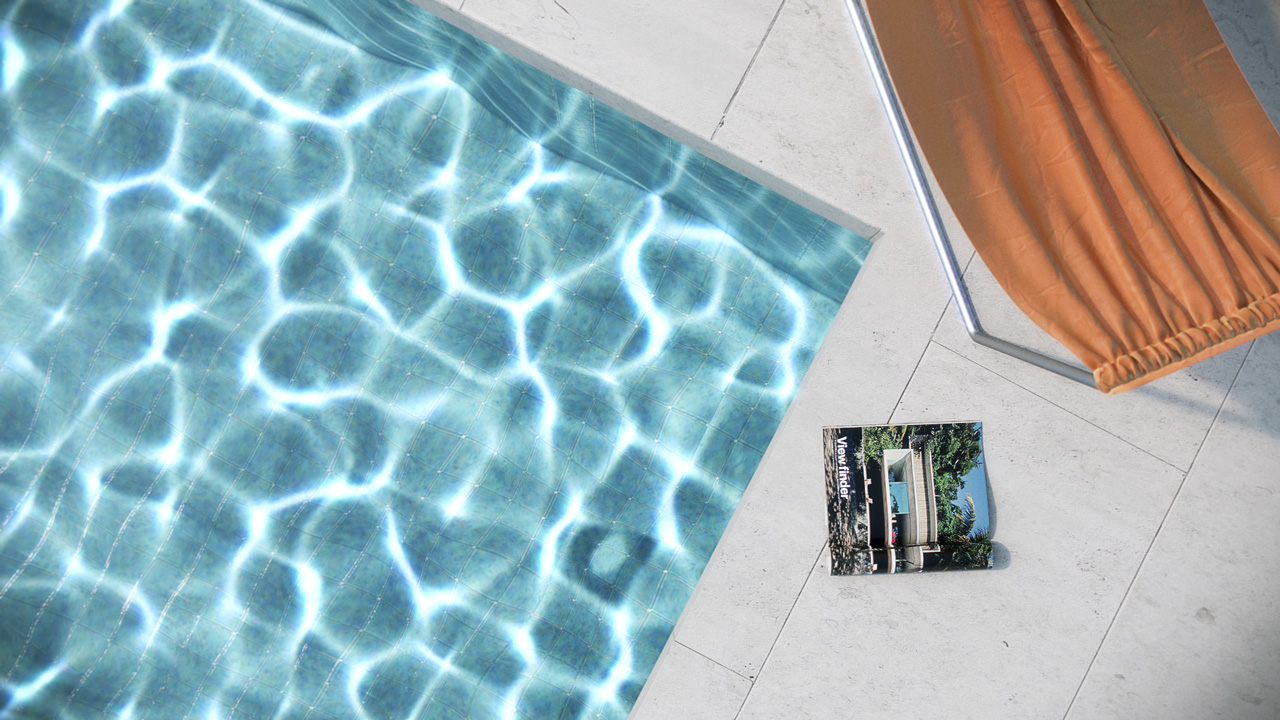
Here are some final renders with different noise and caustics parameters(click for full screen):


i like your tutorial and it was so helpful
Excellent!. Thanks you very much
thanks a lot
Great job
Hi, really great guides. Clear and simple for what seems quite complex issues.
I sure you get a ton of “requests” but if you want an idea for another lesson Vray Multi Materials and working with UV Mapping would be brilliant.
Cheers!
Thank you Louis! Sure that’s a great subject. I hope to make a tutorial on that in the future.
Hello there. Your tutorial so helpful for me. I just fail when I try make pool like in your tutorial, the final result just dissapointed, only flat white reflection. I was following all of your tutorial precisely. I just cant figured it out whats wrong. is it pool material affect to vray caustic? maybe you can help me. Thank you. Sorry for the bad english.
Hi Chris, thanks for stopping by 🙂 It’s hard to tell what exactly went wrong in your scene based on your comment. If you like you can send me your 3ds max file and I’ll look in to it. you can send it to [email protected]
I also thought so, but i just forgot to use my camera 🙂